Introduction
(As Per RabbitMq Doc Introduction) RabbitMQ is a message broker: it accepts and forwards messages. You can think about it as a post office: when you put the mail that you want to post in a post box, you can be sure that the letter carrier will eventually deliver the mail to your recipient. In this analogy, RabbitMQ is a post box, a post office, and a letter carrier.
The major difference between RabbitMQ and the post office is that it doesn't deal with paper, instead, it accepts, stores, and forwards binary blobs of data ‒ messages.
From my perspective, I can define rabbitmq as Queue(Or Priority Queue if priority is enabled) Data Structure. You kinda add data to it using senders and consume the queue data using listeners(consumers).
Setup
For Setup, we can use a spring initializer or can add dependencies. We can address both of them sequentially.
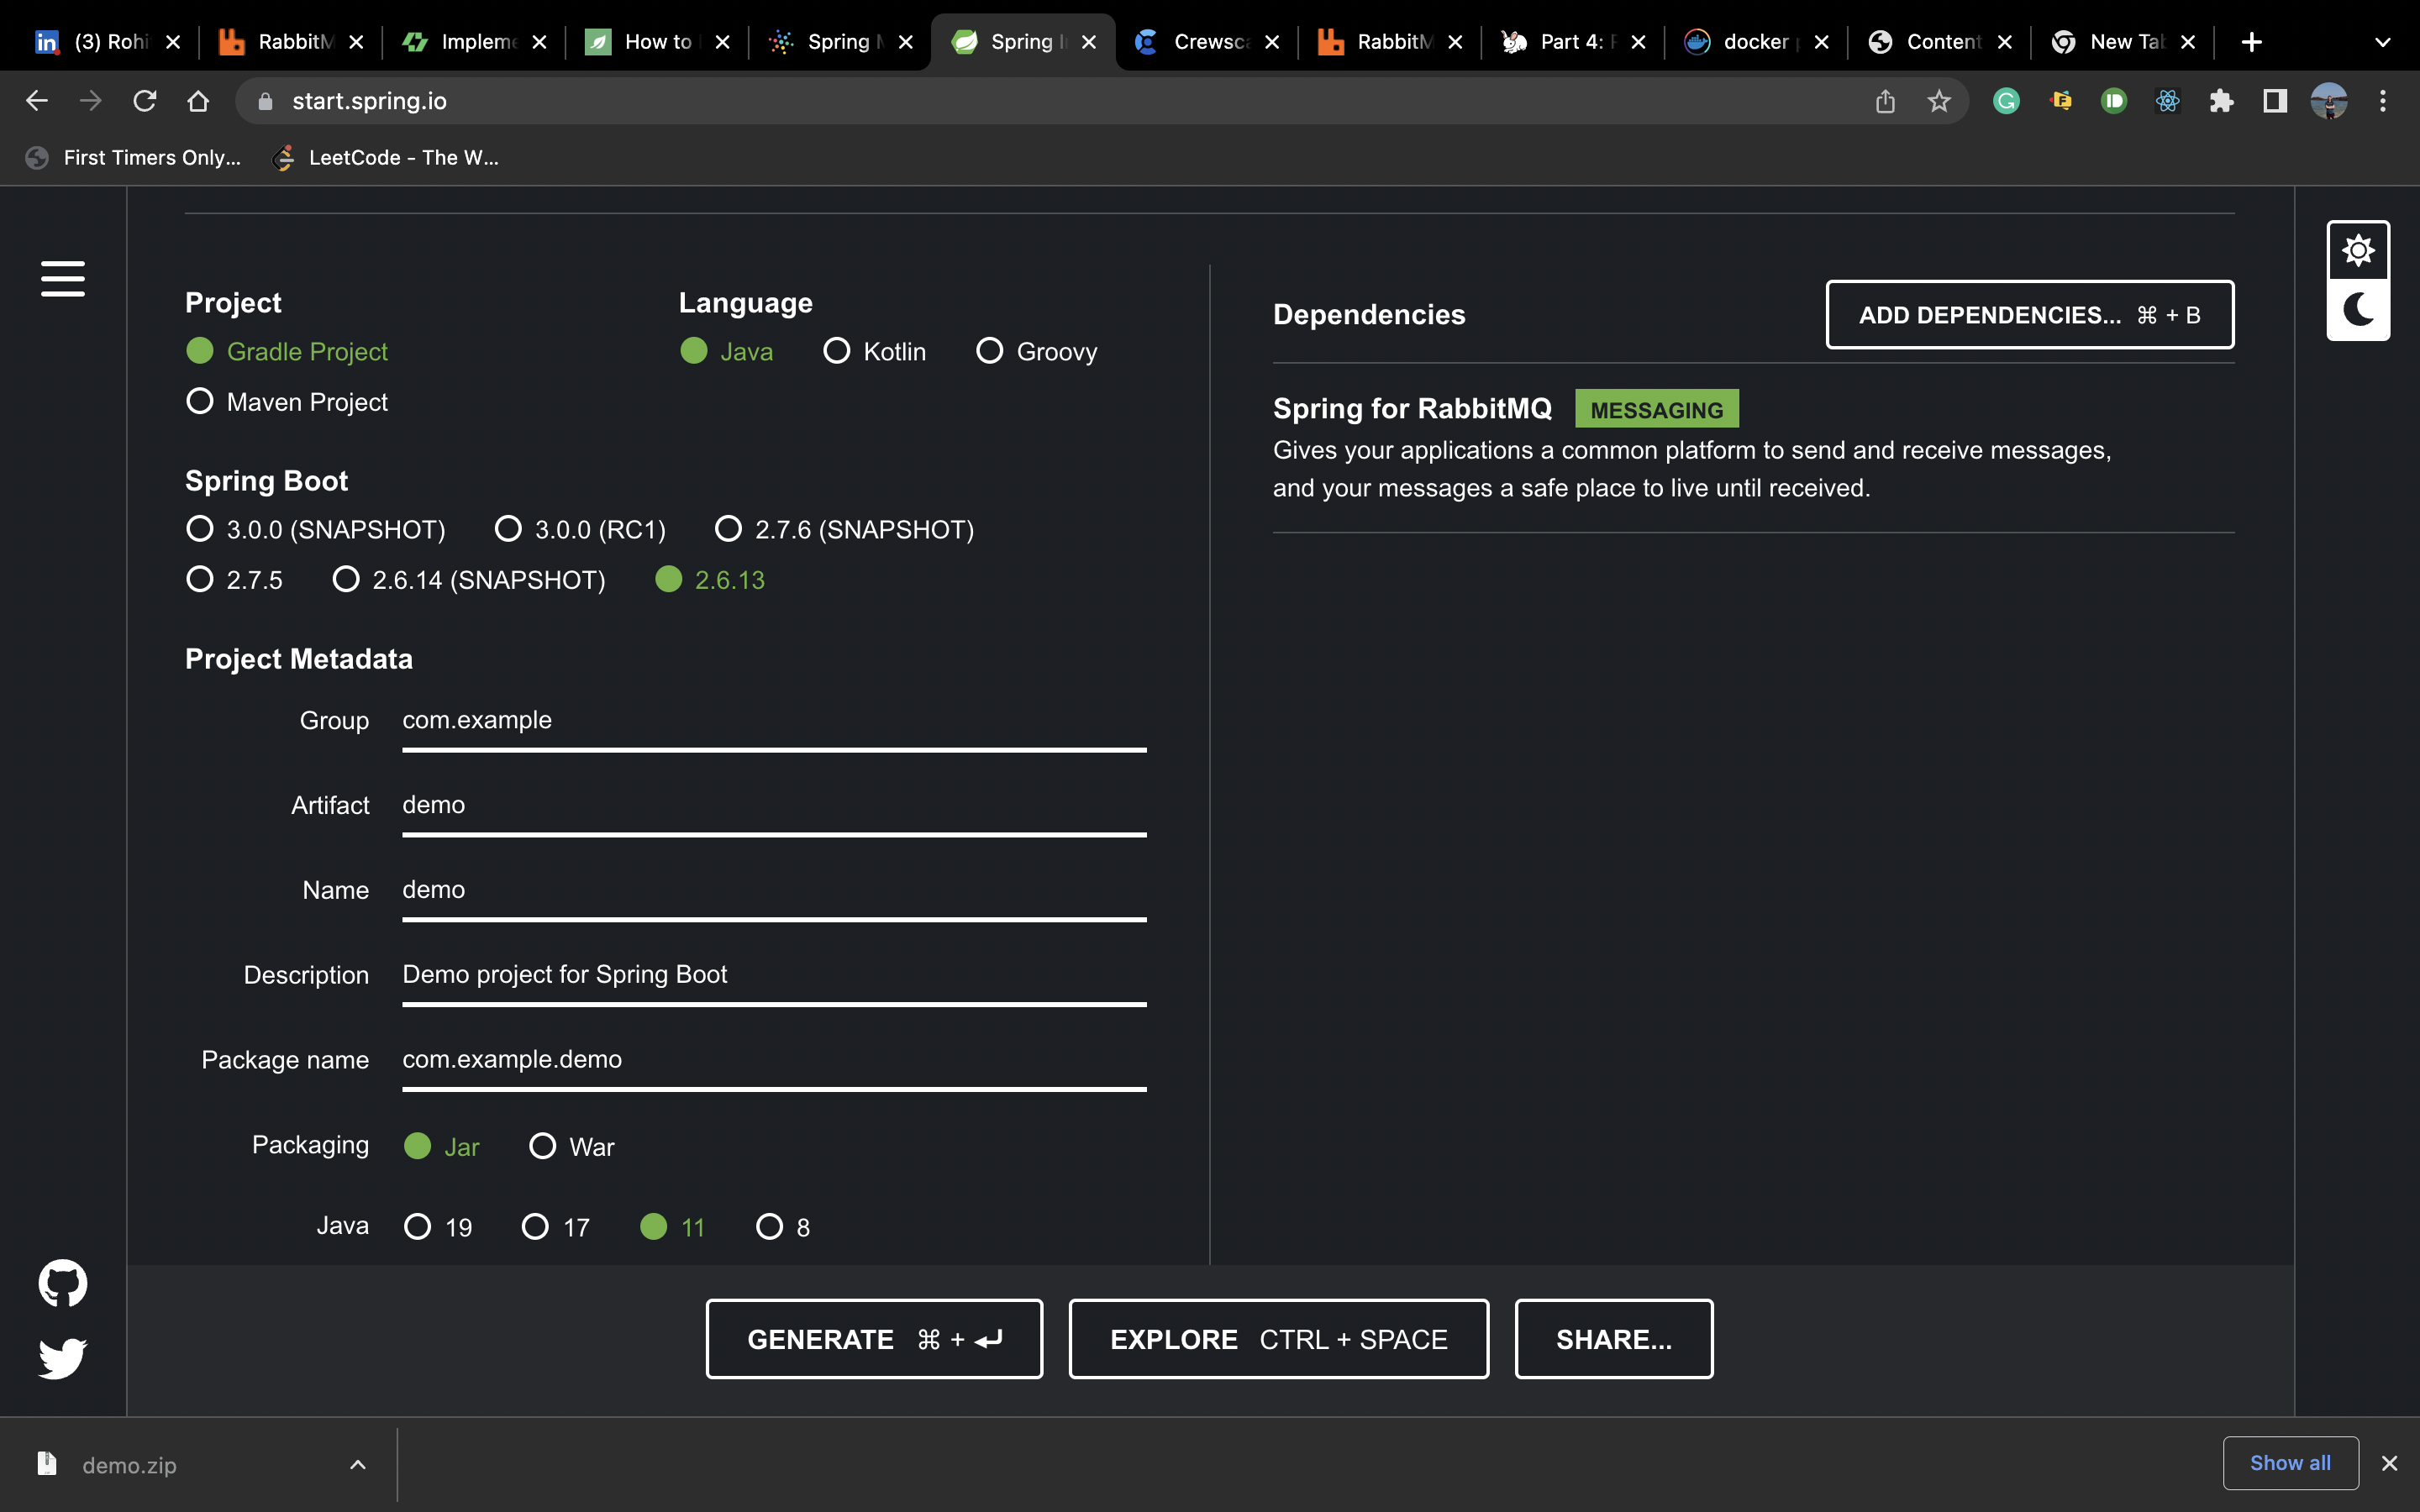
Using Spring Initializer
It is easy to do this using spring initializer, we just have to add rabbitmq dependencies under it, that it. I think you are familiar with others things while setting up spring-boot dependencies.
Adding Dependencies in Existing Projects
For Maven Build add the dependency for rabbitmq:
<?xml version="1.0" encoding="UTF-8"?>
<project xmlns="http://maven.apache.org/POM/4.0.0" xmlns:xsi="http://www.w3.org/2001/XMLSchema-instance"
	xsi:schemaLocation="http://maven.apache.org/POM/4.0.0 https://maven.apache.org/xsd/maven-4.0.0.xsd">
	<modelVersion>4.0.0</modelVersion>
	<parent>
		<groupId>org.springframework.boot</groupId>
		<artifactId>spring-boot-starter-parent</artifactId>
		<version>2.6.13-SNAPSHOT</version>
		<relativePath/> <!-- lookup parent from repository -->
	</parent>
	<groupId>com.demos</groupId>
	<artifactId>rabbitmq.demo</artifactId>
	<version>0.0.1-SNAPSHOT</version>
	<name>rabbitmq.demo</name>
	<description>Demo project for Spring Boot</description>
	<properties>
		<java.version>11</java.version>
	</properties>
	<dependencies>
        <!--rabbitmq dependency-->
		<dependency>
			<groupId>org.springframework.boot</groupId>
			<artifactId>spring-boot-starter-amqp</artifactId>
		</dependency>
		<dependency>
			<groupId>org.projectlombok</groupId>
			<artifactId>lombok</artifactId>
			<optional>true</optional>
		</dependency>
		<dependency>
			<groupId>org.springframework.boot</groupId>
			<artifactId>spring-boot-starter-test</artifactId>
			<scope>test</scope>
		</dependency>
		<dependency>
			<groupId>org.springframework.boot</groupId>
			<artifactId>spring-boot-starter</artifactId>
		</dependency>
		<dependency>
			<groupId>org.springframework.amqp</groupId>
			<artifactId>spring-rabbit-test</artifactId>
			<scope>test</scope>
		</dependency>
		<dependency>
			<groupId>org.springframework.boot</groupId>
			<artifactId>spring-boot-starter-web</artifactId>
			<version>2.6.2</version>
		</dependency>
    </dependencies>

	<build>
		<plugins>
			<plugin>
				<groupId>org.springframework.boot</groupId>
				<artifactId>spring-boot-maven-plugin</artifactId>
			</plugin>
		</plugins>
	</build>

</project>
For Gradle Build add dependency for rabbitmq:
plugins {
	id 'org.springframework.boot' version '2.6.13'
	id 'io.spring.dependency-management' version '1.0.15.RELEASE'
	id 'java'
}

group = 'com.example'
version = '0.0.1-SNAPSHOT'
sourceCompatibility = '11'

repositories {
	mavenCentral()
}

dependencies {
    // rabbitmq dependency
	implementation 'org.springframework.boot:spring-boot-starter-amqp'
	testImplementation 'org.springframework.boot:spring-boot-starter-test'
	testImplementation 'org.springframework.amqp:spring-rabbit-test'
}

tasks.named('test') {
	useJUnitPlatform()
}
Setting up RabbitMQ
RabbitMq is server service. So for convenience, I will be using docker to run rabbitmq container. Using below command we can run the docker container locally
docker run --name rabbitmq -p 15672:15672 -p 5672:5672 rabbitmq:3-management
Configuration
Configuration Part for this is optional for local setup. Spring boot offers many features but in this, we will be covering the basic ones. Spring boot application have the option to provide these properties using application.properties or application.yml. We will be using yml one:
spring:
  rabbitmq:
    host: localhost
    port: 5672
    virtual-host: /
    username: guest
    password: guest
Now to add data to the queue we need RabbitTemplate. So for this, we need to initialize the RabbitTemplate Bean. So for this you can add a new configuration class that will initialize the Bean.
@Configuration
@Slf4j
public class RabbitMqConfig {

    @Bean
    public RabbitTemplate rabbitTemplate(ConnectionFactory connectionFactory) {
        log.info("Host = {} Username: {}", connectionFactory.getHost(), connectionFactory.getUsername());

        RabbitTemplate template = new RabbitTemplate(connectionFactory);
        template.setMessageConverter(new Jackson2JsonMessageConverter());

        return template;
    }
}
Fun Part OR Functionality
Now coming to the fun part of rabbitmq that is using actually use it and what better than a Hello World program. So for this demo purpose, the scenario is pretty simple we want to send Hello World! to the consumer and then want our listeners(consumers) to consume that message and then print. So adding the message to consumer is an event that I want to trigger while the microservice is UP, so we will be using a controller to send the message to the service.
Controller and Sender Service
We will be creating a Rest Controller which will be /send/message which will use the RabbitTemplate to send Hello World! message to the queue. So I created a controller class called SenderController. The code for the class be as below:
@RestController
@Slf4j
@RequestMapping("/send")
public class SenderController {

    @Autowired
    RabbitTemplate rabbitTemplate;

    @PostMapping("/message")
    public String publishMessage() {
        log.info("Got Request to Send Message");
        String message = "Hello World";
        rabbitTemplate.convertAndSend("spring-exchange", "routing-key", message);

        return "Sent";
    }
}
And then we will add the RabbitTemplate implementation to add messages to the queue. So for this, I will be creating a new exchange "spring-exchange" and the routing key "routing-key" you can name it whatever you want or can use existing exchanges. What is an exhange and routing key? So for exchanges and routing key explanation I will not go into details, understand it like this exchanges are entities in rabbitmq that it responsible to send message to the respective queues based on routing keys. So exchanges decide where to send messages based on routing key. For more details on exchange visit here.
So coming back to implementation we will be using the newly introduced exchange and routing key.
Listeners / Consumers
So using the above code we will be able to publish new messages to the queue but there is a catch you have to create the queue and exchanges on the server if not exist. But there is a walk around this hassle just create the Listener definition on the application and on running the application the required queues and exchanges will be created. So let's run our application now and check rabbitmq tab at localhost:15672 for local testing.
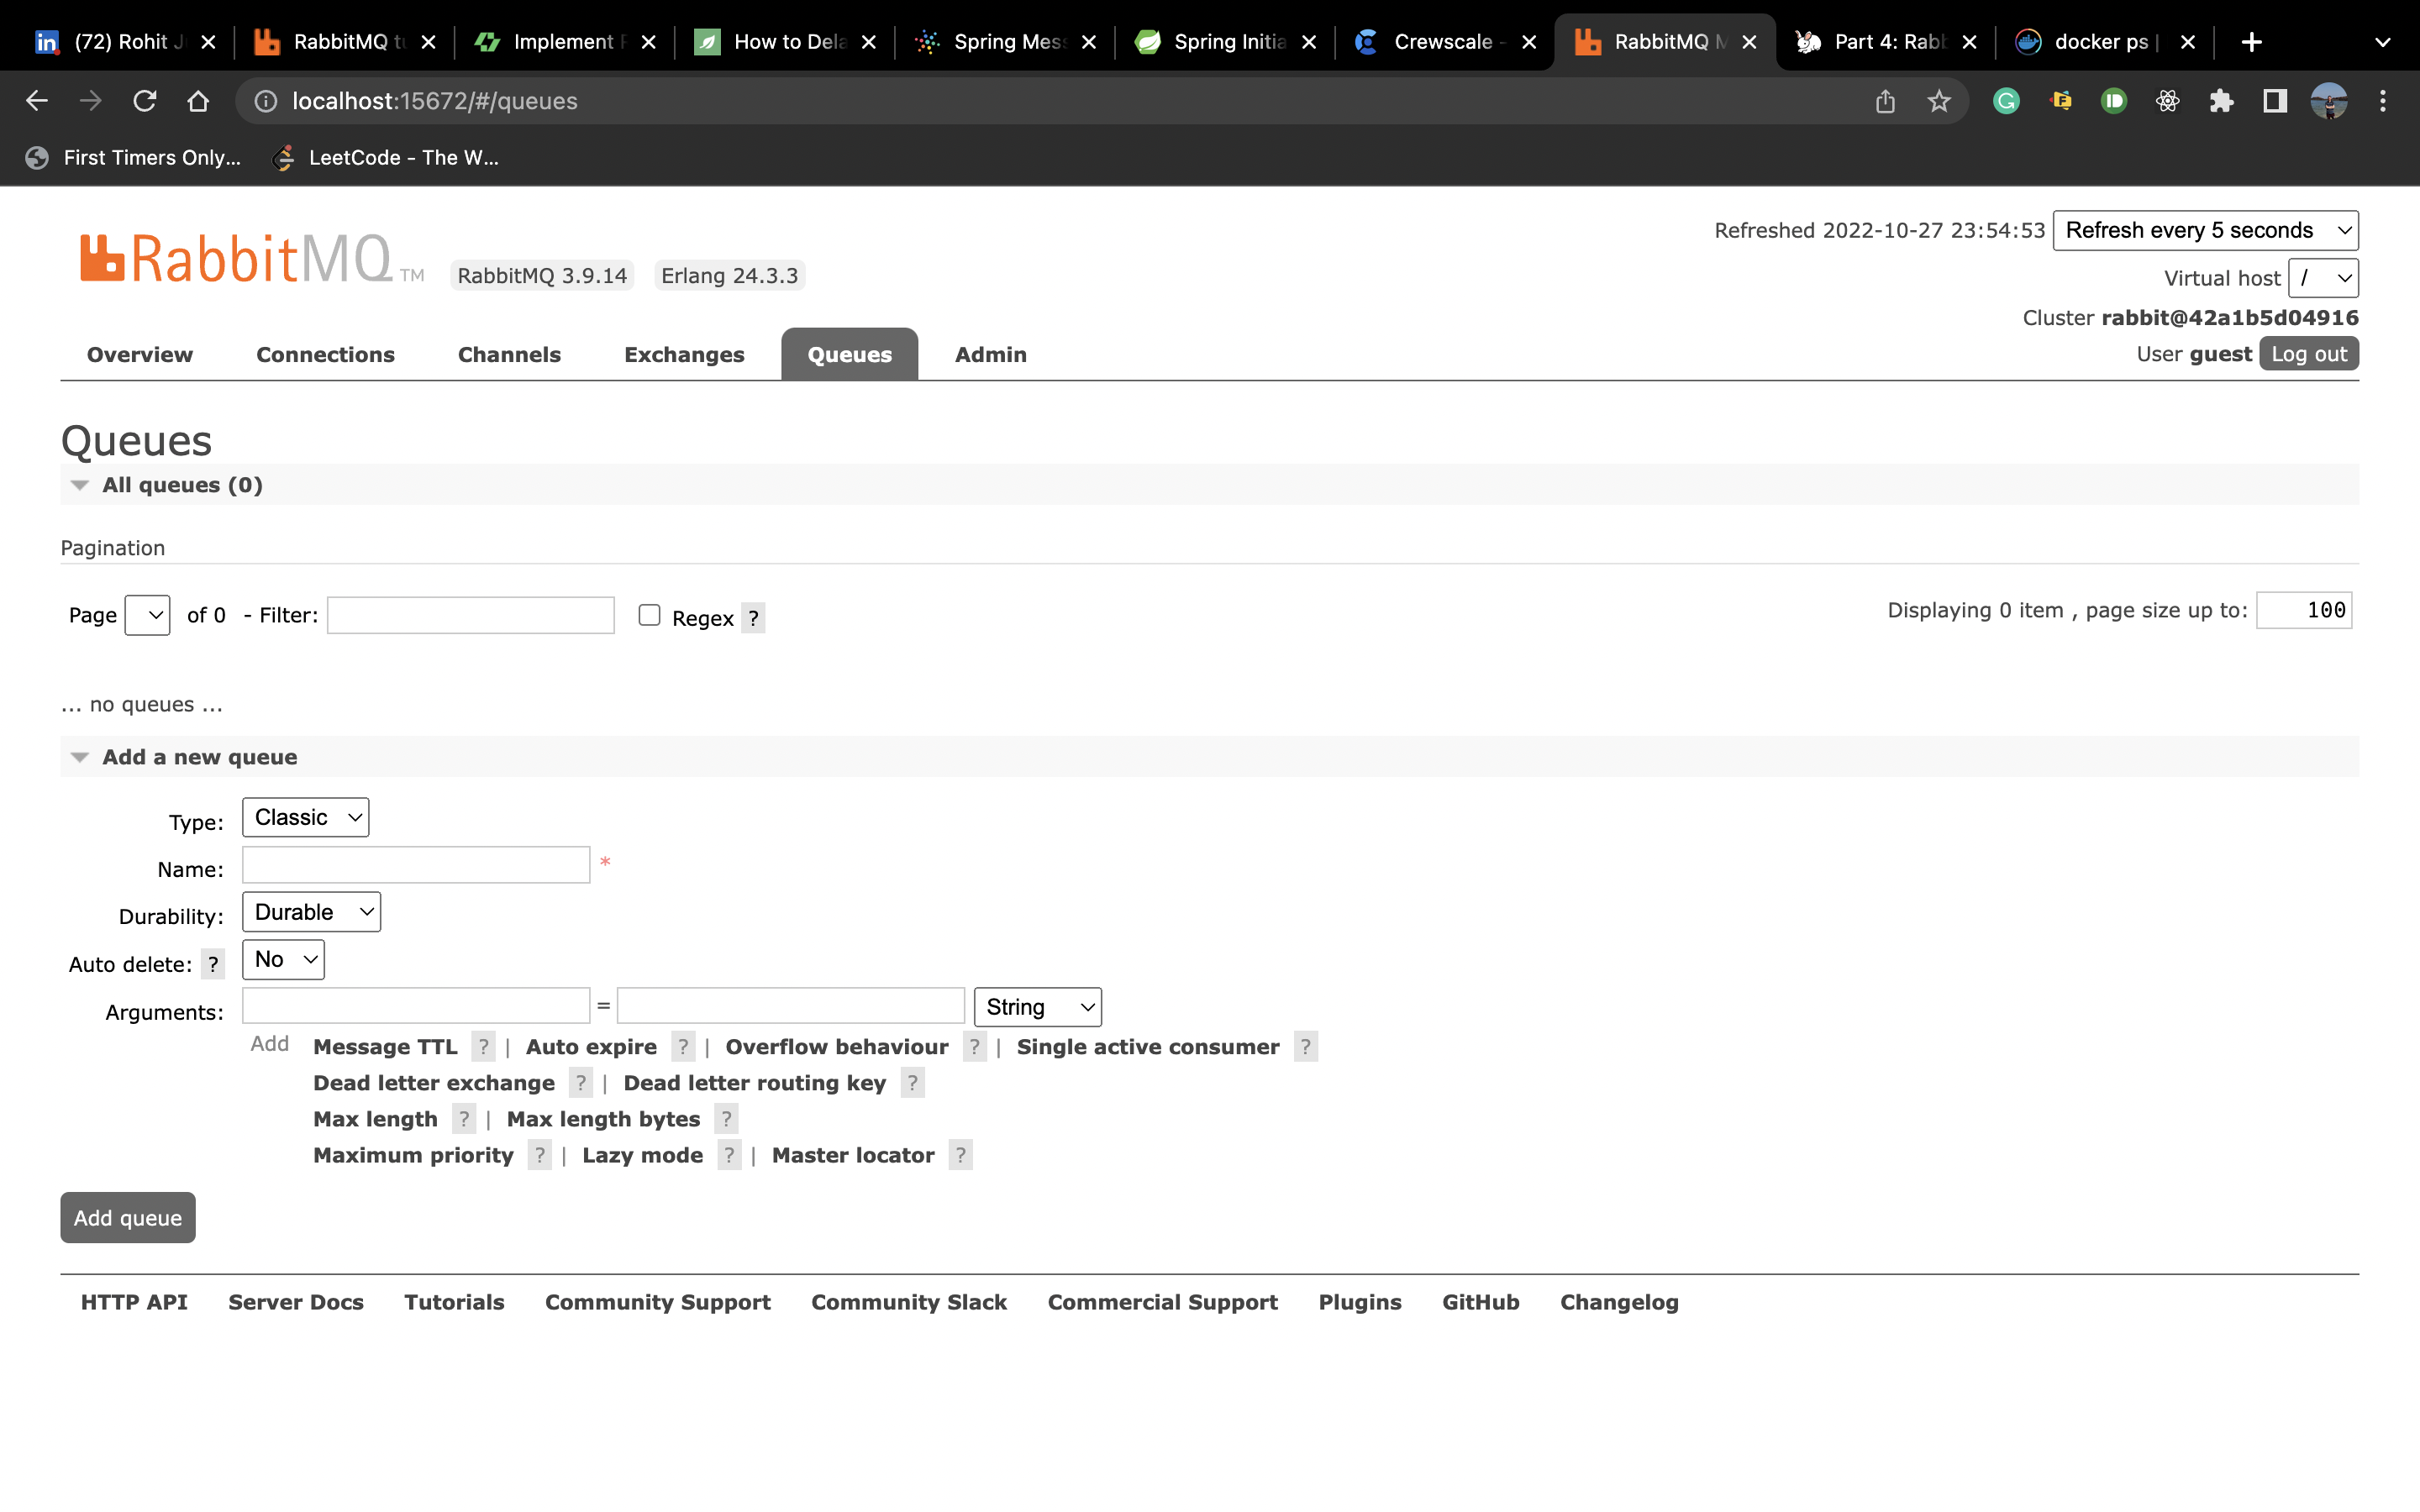
As you can see there is no queue. Even when hitting the sender controller URL we will be getting error that no exchange found.
So let's create a listener. So we will create a new class called HelloListener. Create a method to consume the Data, and Since our data is of string we will take argument as string. Code:
@Slf4j
@Component
public class HelloListener {

    @RabbitListener(bindings = @QueueBinding(value = @Queue(value = "spring-test"),
            key = "routing-key",
            exchange = @Exchange("spring-exchange")))
    public void listener(String message) throws IOException, InterruptedException {
        log.info("Message = {}, Properties: {}", message);
    }
}
Now we are using the RabbitMqListener annotation where we will be defining our queue with exchange the routing key associated with it. There are multiple advance features but we will be covering the basic ones.
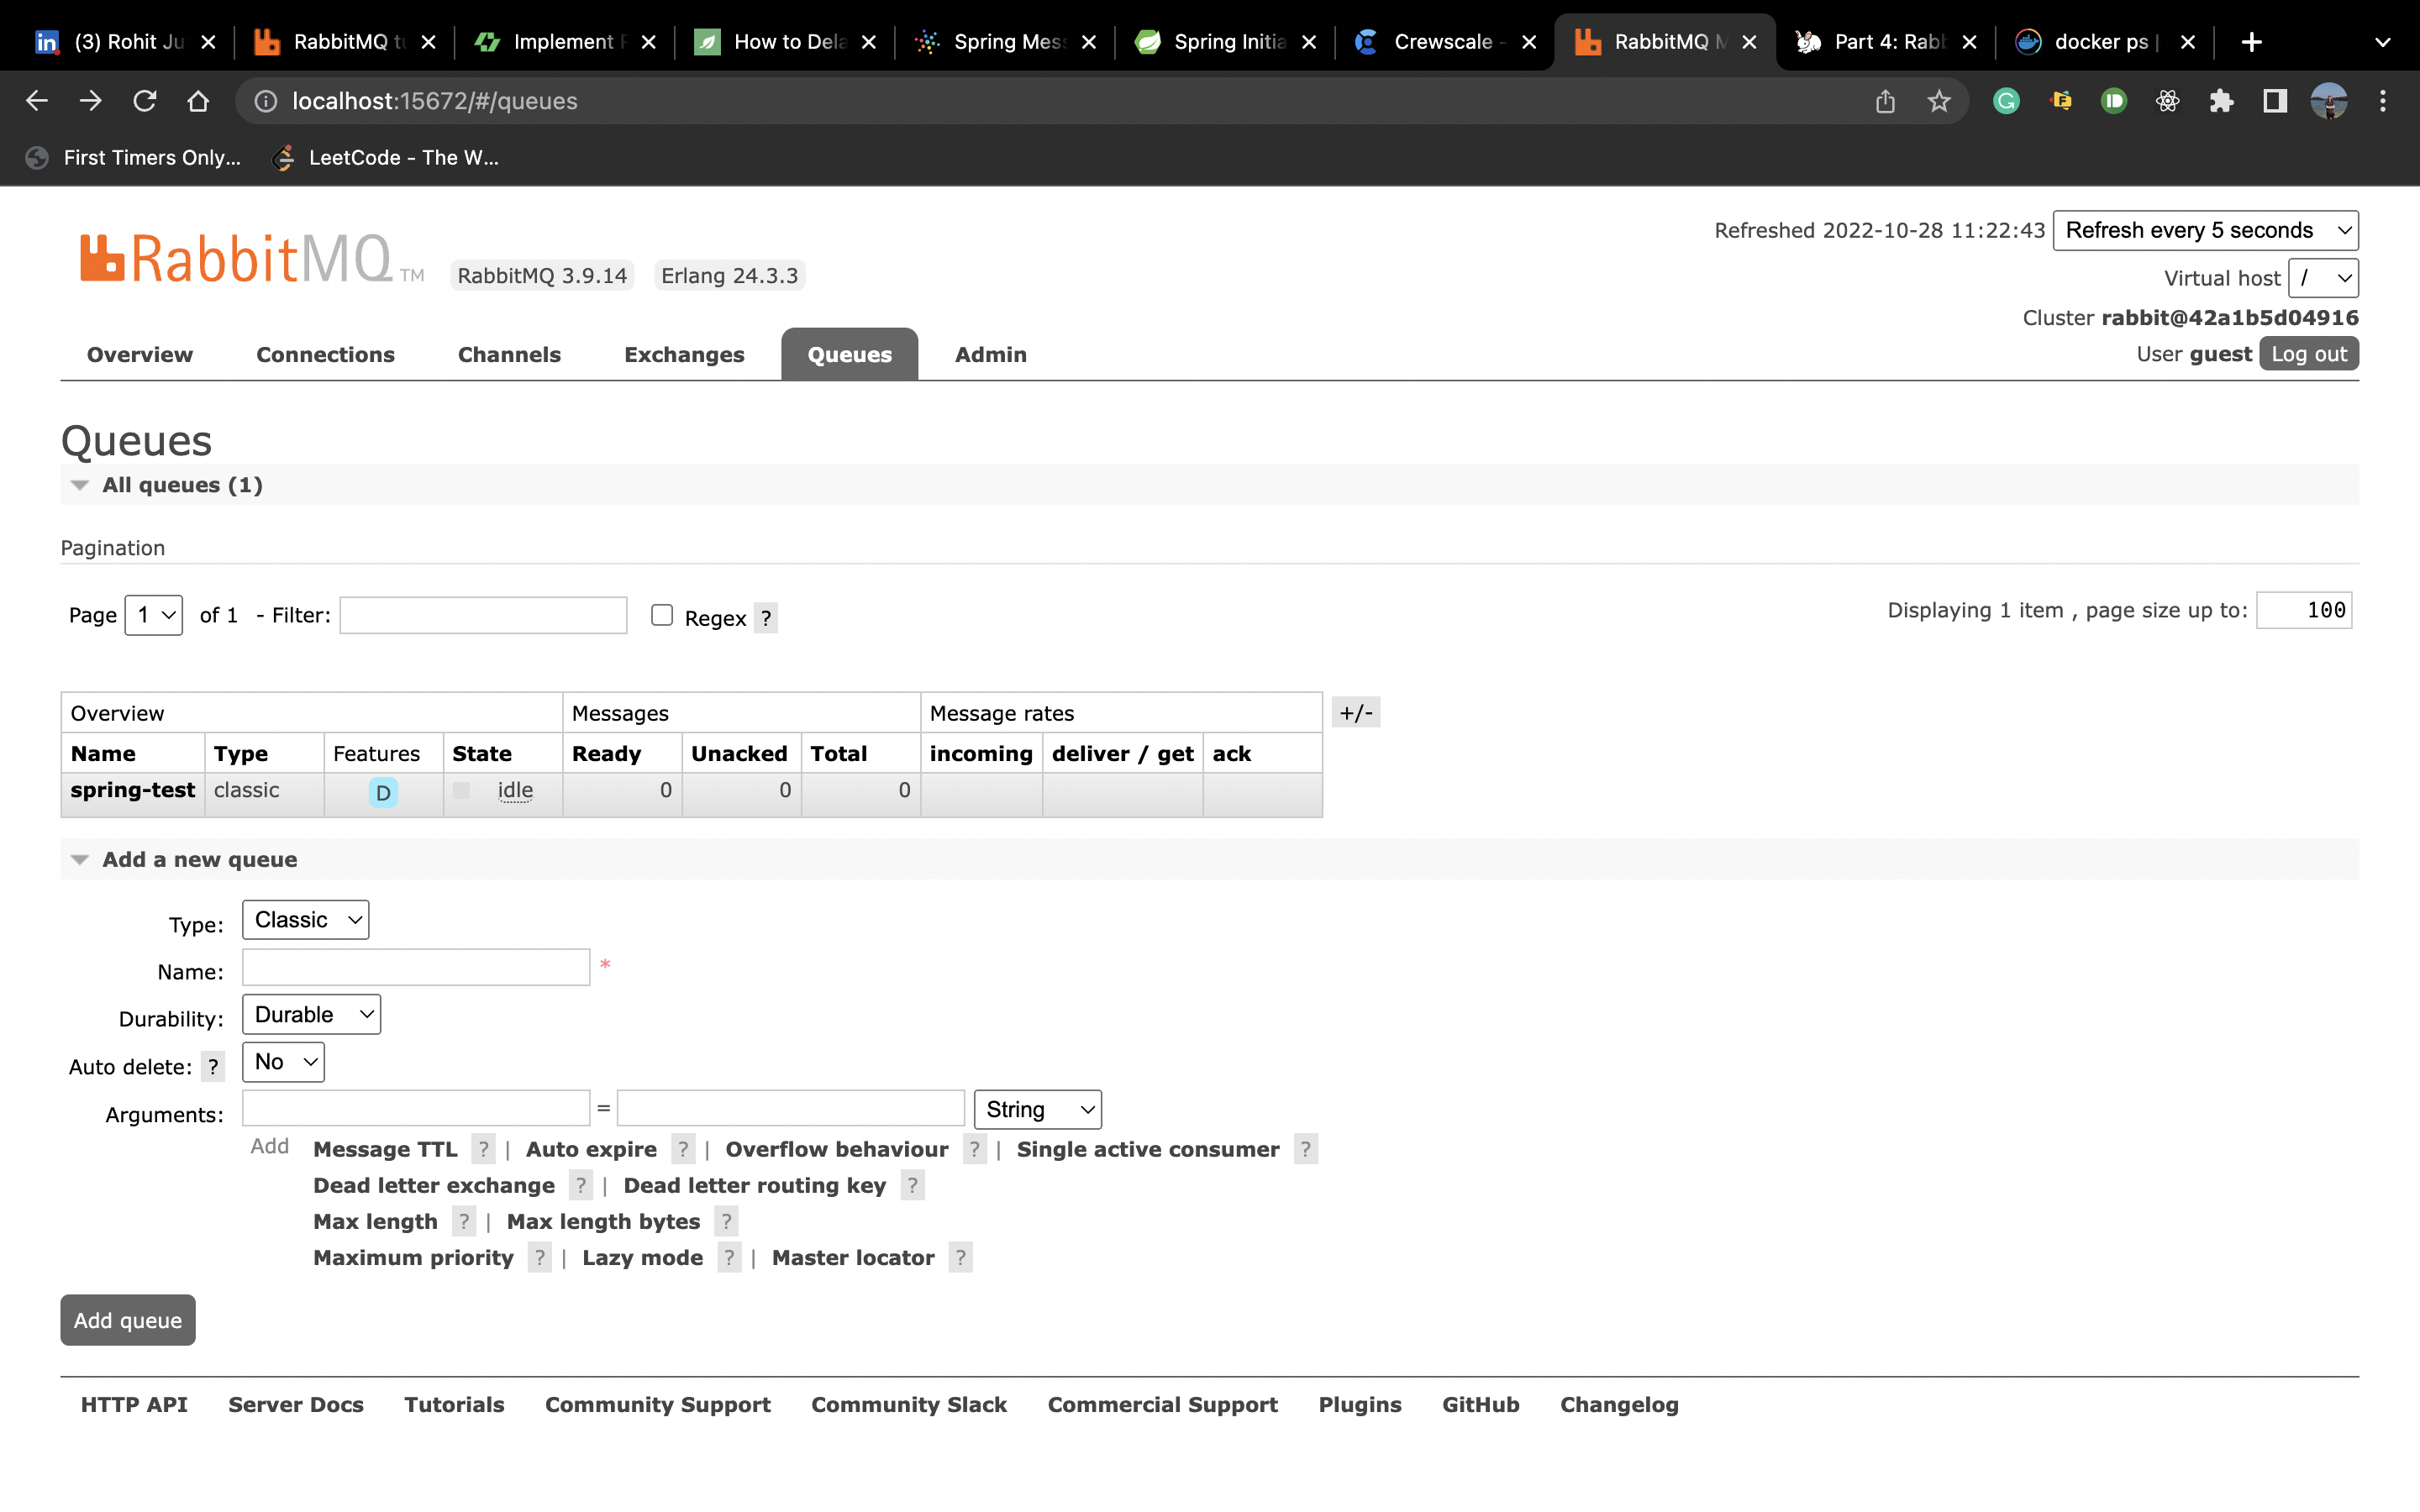
Now Again we run the application and check that the queue and exchanges are getting created. You can send the request as well. Currently, our consumer just logs it.